Tech Tip: How To Set Up SAML For Your Customers
Our experts guide you on the simple steps needed to help customers enable SAML sign-on authentication, a security and convenience feature now available with the PaperVision® suite.

TECH TIP: HOW TO SET UP SAML FOR YOUR CUSTOMERS
By Kayne Jensen, Technical Support Engineer
A recent convenience added to the PaperVision® suite is SAML single sign-on authentication. (For your customers not familiar with SAML, take a moment to highlight SAML’s simplicity for verifying user identity and privileges.)
Adding SAML is quick and easy. Keep reading for the step-by-step guide.
What is SAML?
SAML is short for Security Assertion Markup Language. It enables users to access multiple web applications using one set of login credentials.
SAML is an umbrella standard that covers federation, identity management and single sign on. Single sign allows users to access multiple web applications with one login. Service providers and intrusion detection systems can use SAML to verify credentials. SAML validates that the user is who they say they are when providing access to websites and applications.
Set up SAML in just a few steps
When configuring SAML to be used with PaperVision® Enterprise (PVE), there are a few items to set up first.
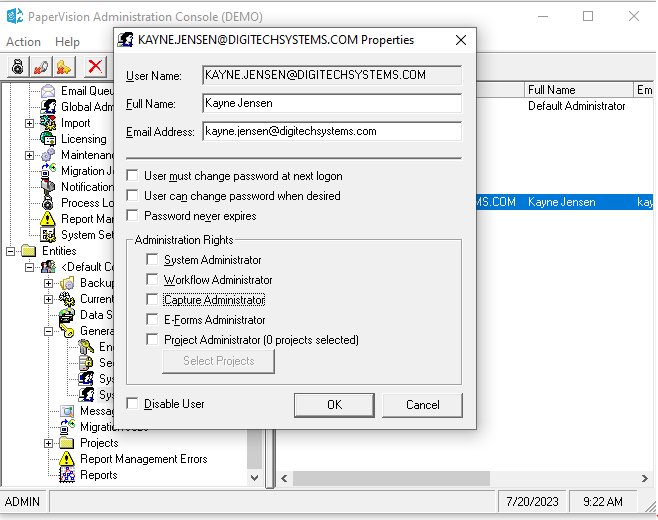
1. Create a user in PVE. The PVE user name must match the same user name as what they are using from their SAML provider. This user does not need any special administrative rights.
- The Full Name field can be used to show the person’s name instead of their email on the site.
- The Email Address can use the same email address that was configured for the User Name.
- You will also need a configuration file (saved as .XML) from your SAML provider that can be used to import these settings into PVE.
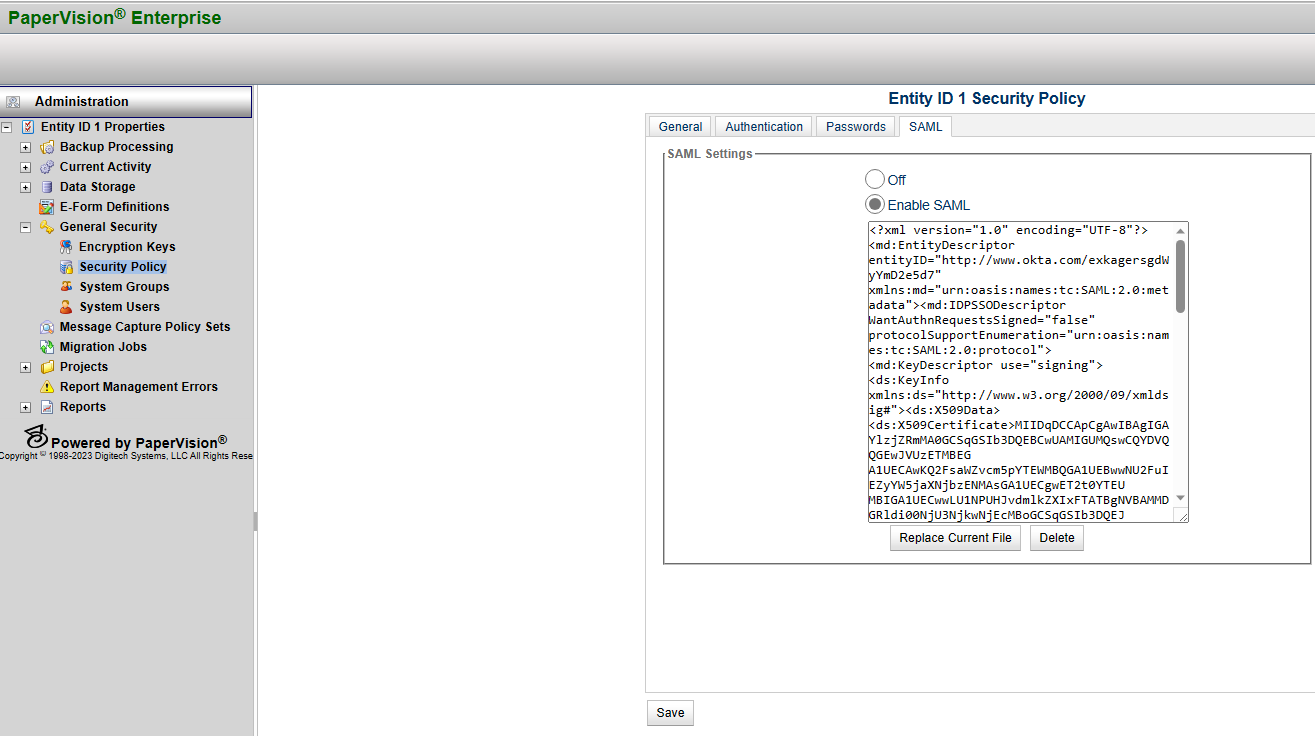
2. Once you have created a user and have the applicable XML file, System Admins can enable the use of SAML through the Web Administration page. To find the setting:
- Expand the General Security section.
- Select Security Policy and then navigating to the SAML tab.
- Click the “Enable SAML” option.
- Import the XML file from the SAML provider.
- Click Save at the bottom of the window.
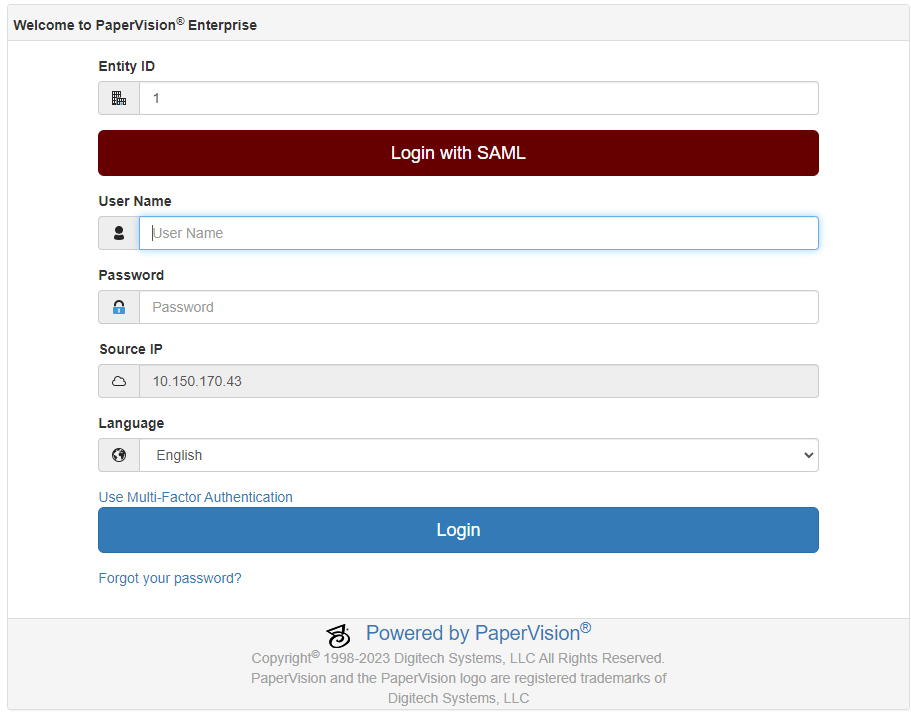
Once this is complete, a user will see an option to login using SAML when they access the website.
The addition of SAML continues Digitech Systems’ dedication to our Big Four principals: easy to use, feature rich, architectural flexibility and price-performance. With SAML authentication, your customers can securely log into multiple applications using a single set of credentials. Close more deals by showing customers the benefits of SAML and other advances with Digitech Systems information management products and services. Reach out to your client development representative with any questions.
________________________________________
Digitech Systems Sales and Marketing